DIY Meade LXD75 OnStep Conversion

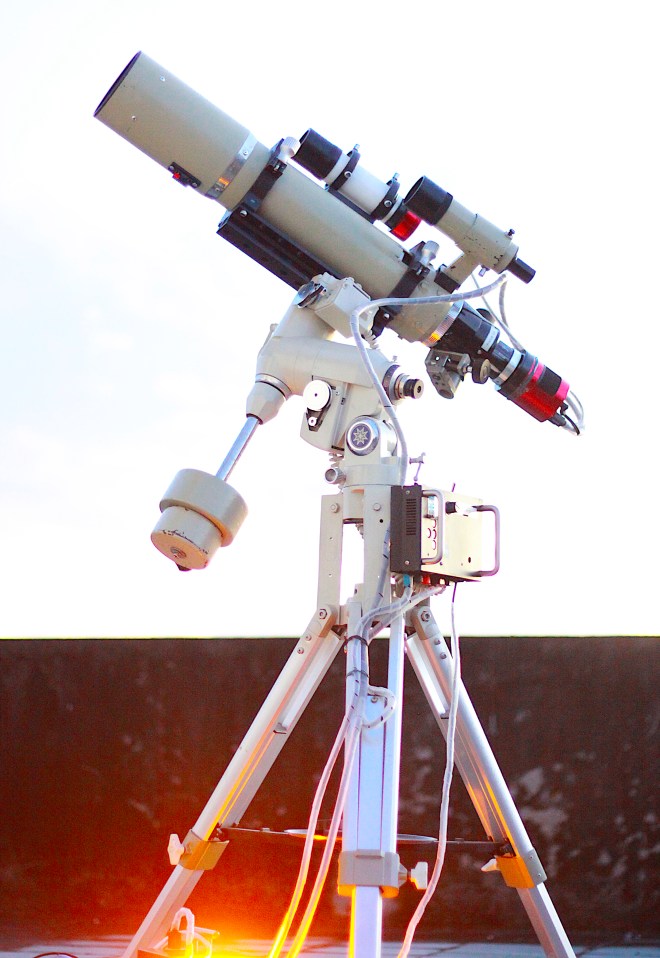
The original controller of this Meade LXD75 mount has failed and a DIY OnStep controller was used to repair the mount and restore its tracking and go-to capability. I have installed RA and declination motors and used an Arduino microcontroller to control the motors. Just like the mounts typical of this class and era, it has a 144:1 main shaft gear reduction, and looks very similar to the Vixen Great Polaris mount. It takes 144 full rotations of the worm to rotate the RA or declination shaft 360 degrees.

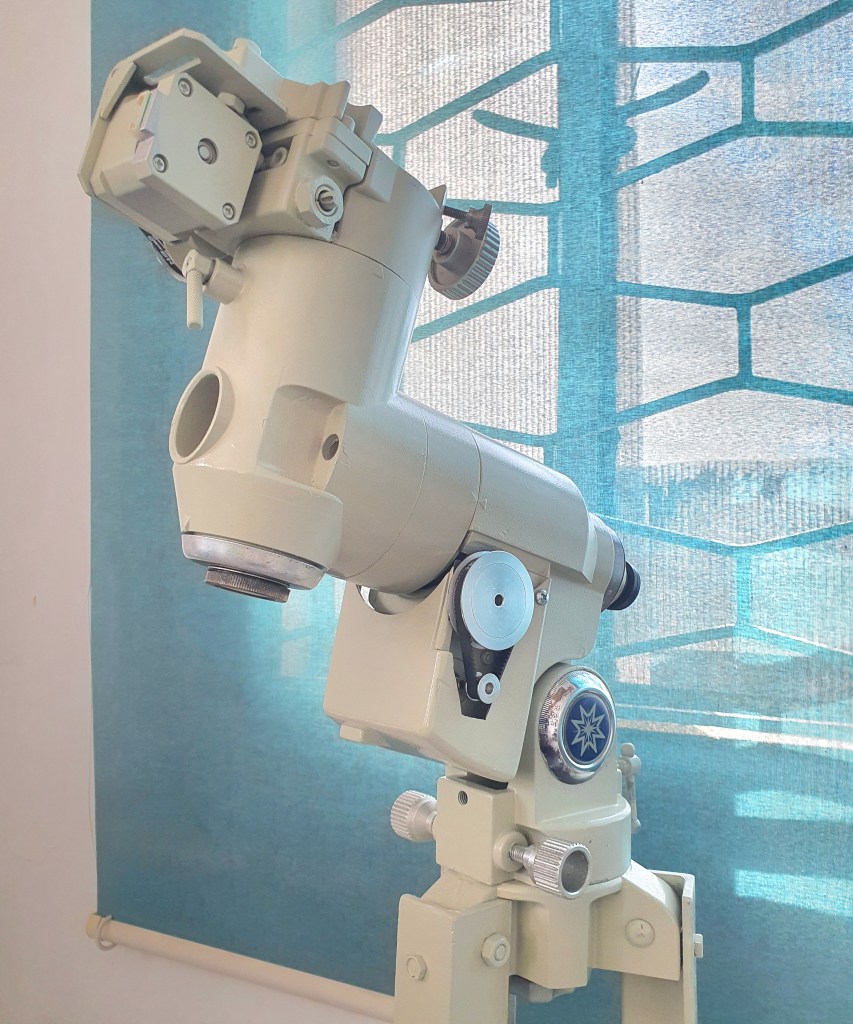
I used NEMA 17 stepper motors on an L-brackets with 16-teeth and 60-teeth pulley and belt drive system for each axis. The total steps are 200 steps * 60/16 reduction * 144/1 teeth worm drive with 1/64 micro-stepping, at 6, 912, 000 per 360 degrees, or 19,200 per degree. 

The mount uses an Arduino Mega 2560 as the main controller board, a pair of LV8729 stepper motor driver, and an HC-05 Bluetooth module (which connects to the OnStep Android app). It is powered by a 12V 12A power supply. To watch a video of this Meade LDX75 OnStep conversion during testing, click here.

Related link:
DIY Controller for Vixen Great Polaris Mount

Night Sky in Focus 
© Anthony Urbano | Bacoor, Philippines

DIY Pier Extension

I have built a DIY pier extension to allow my DIY go-to telescope to move without hitting the tripod legs. It consists of three 12-inch L-bars (which I later shortened to 7.5 inches, after measuring the minimum clearance required) that lift the tripod head. I repurposed a tripod head from an old tripod to serve as the base where the L-bars and the tripod legs connect to. The pier extension allows unattended imaging without the risk of damage to the mount or telescope.

DIY Pier Extension

To watch a video of the telescope performing a successful meridian flip without hitting the tripod legs, click here.

Related link: Converting the Vixen Great Polaris mount into a Go-to mount

Night Sky in Focus 
© Anthony Urbano | Bacoor, Philippines

DIY Controller for Vixen Great Polaris

I have built an OnStep go-to telescope controller for a Vixen Great Polaris mount. I used an Arduino Mega 2560 as the main controller board, a pair of LV8729 stepper motor driver, and an HC-05 bluetooth module (which connects to the OnStep Android app).

I also built a Smart Hand Controller (SHC) using an ESP32 module, an OLED display, and a button array. The SHC connects to the same serial communication lines (Rx and TX pins) used by the HC-05 bluetooth module. I use a toggle switch to select between the HC-05 Bluetooth module for the Android controller and the Smart Hand Controller with ESP32 module.

I used a pair of 200-step-per-revolution stepper motors paired with 60-teeth and 16-teeth pulley and belt drive system to motorize the Vixen Great Polaris mount with 144:1 worm drive. In this configuration, the total steps are 200 steps * 60/16 reduction * 144/1 teeth worm drive = 108,000 steps per 360 degrees at full stepping. Actual testing showed that accurate tracking is possible even at just 1/64 microsteps (as evident in a 60 second unguided exposures at 900 mm focal length). This brings the total steps per revolution to 6, 912, 000 per 360 degrees, or 19,200 per degree. You need to configure these values in the OnStep code.

The OnStep telescope controller can be connected to NINA to enable automatic slewing to targets and use plate-solving to validate and refine its pointing accuracy. It also connects with Stellarium to display real-time the telescope’s current position.

OnStep will have very accurate pointing and tracking even with just one-star alignment, if properly polar-aligned.

Related link: Meade LXD75 OnStep Upgrade

Night Sky in Focus 
© Anthony Urbano | Bacoor, Philippines

Laser Pointer Finder

I have installed a laser pointer to my telescope as a tool for locating objects. The laser pointer is mounted on a finder scope holder with collimation screws to enable alignment with the telescope. It has a toggle switch that allows the laser to be turned on and off.

Using laser pointer as a finder

To find an object such as a galaxy or a nebula, I turn the laser on and point the telescope to the target’s approximate location as indicated in a star map. If the target is too dim and there are no bright stars in the vicinity, I just use a pair of binoculars to spot the target and then slew the telescope manually to the target. The laser allows me to know precisely where the telescope is pointed at, and then use the laser to guide the telescope to the target. Observe safety precautions when using laser pointers.

To view posts on DIY projects and astronomical equipment, click here.

Night Sky in Focus 
© Anthony Urbano | Bacoor, Philippines


Sky-Watcher Equinox 100 ED

The 2011 Sky-Watcher Equinox 100 ED 4 in f/9 refractor is my first telescope and used both for visual observation and astrophotography. The Optical Tube Assembly (OTA) features a 4-in f/9 extra-low dispersion (ED) apochromatic (APO) lens design.

Modified Sky-Watcher Equinox 100ED at f/6.08 (100 mm aperture, 608 mm focal length)

It has a 2-inch dual-speed Crayford focuser with a thumbscrew underneath for locking the draw tube. The telescope comes with aluminum-lined wooden carrying case. It is supplied with two eyepieces: 25 mm and 5 mm. Supplied also is a 90-degree 2-inch diagonal mirror and an 8 by 50 finder scope.

In 2021, the telescope has been modified and fitted with a DIY reducer, making the telescope shorter and faster (from f/9 to currently at f/6.08) and also reducing the tube length by 20 cm. The effective focal length is now 608 mm (from native 900 mm).

Related link: View all images taken with the Sky-Watcher Equinox 100ED

Night Sky in Focus 
© Anthony Urbano | Bacoor, Philippines