I have built a DIY pier extension to allow my DIY go-to telescope to move without hitting the tripod legs. It consists of three 12-inch L-bars (which I later shortened to 7.5 inches, after measuring the minimum clearance required) that lift the tripod head. I repurposed a tripod head from an old tripod to serve as the base where the L-bars and the tripod legs connect to. The pier extension allows unattended imaging without the risk of damage to the mount or telescope.
DIY Pier Extension
To watch a video of the telescope performing a successful meridian flip without hitting the tripod legs, click here.
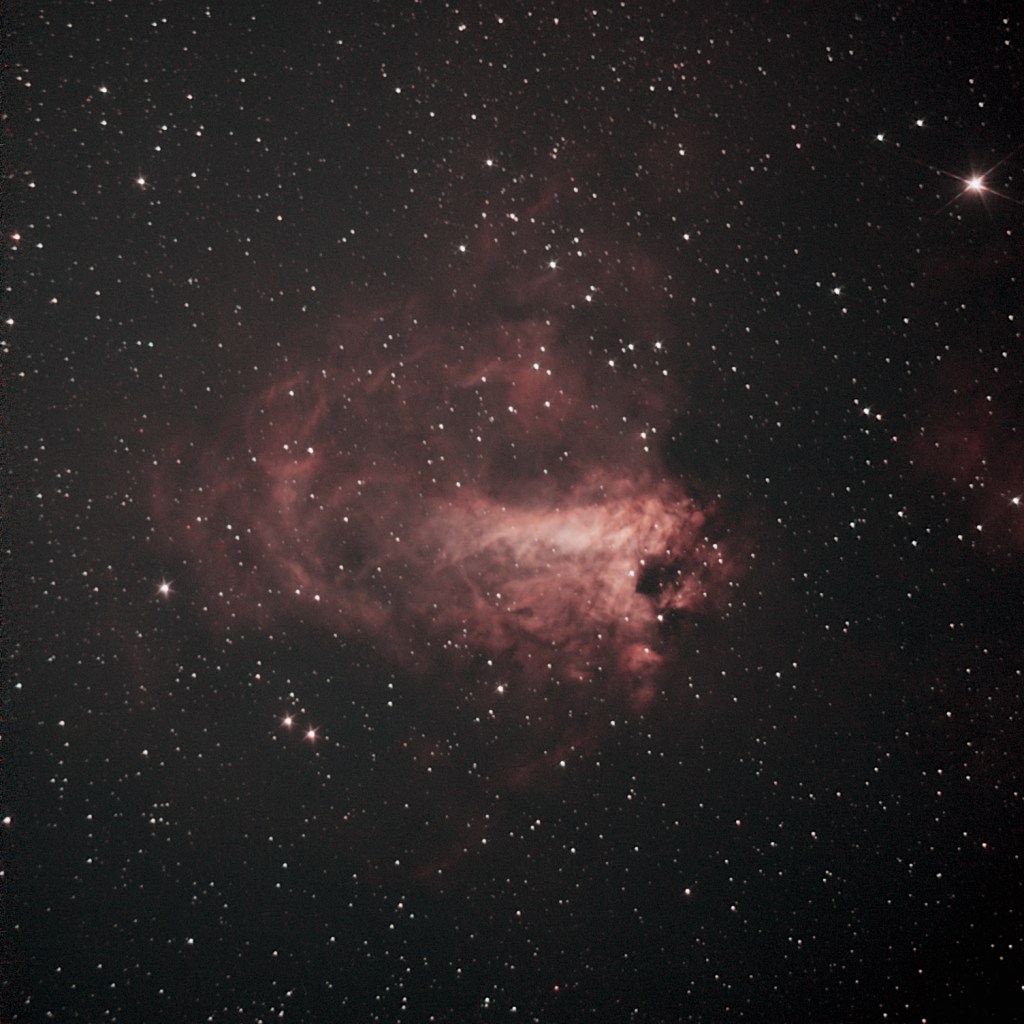
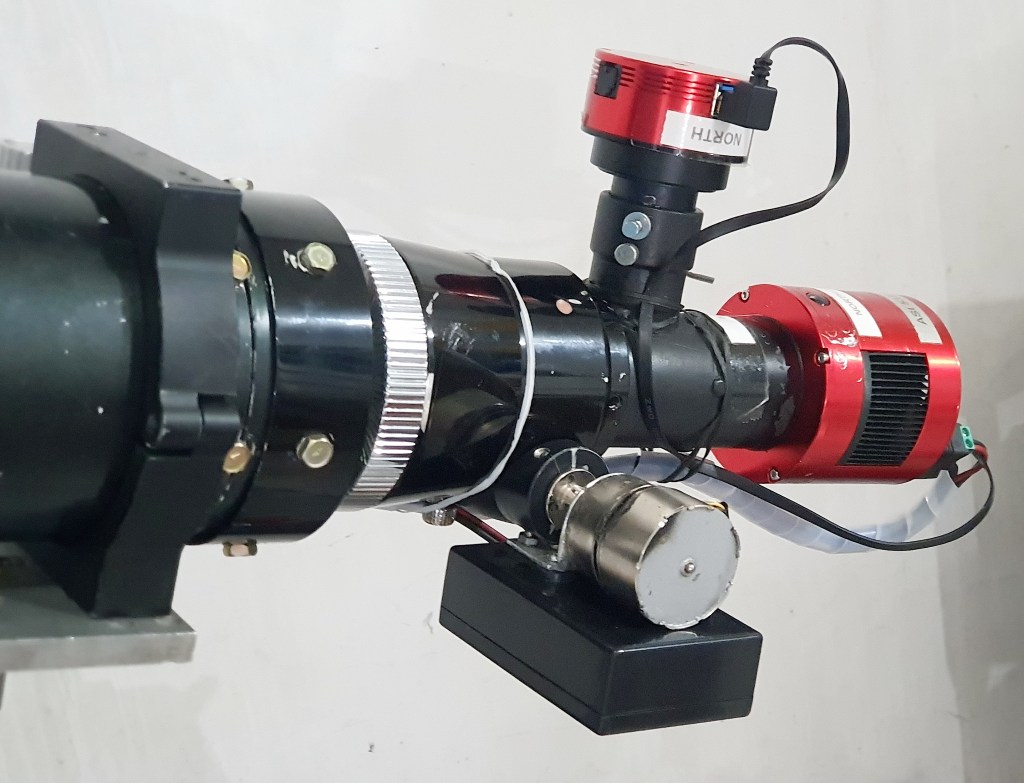
Omega Nebula M17 imaged with a Vixen R114 reflector, an ASI 533MC cooled astronomy camera, dual band H-alpha and O-III filter, with an ASI 174MM guide camera on a 60 mm guide scope. This is one of the brightest deep-sky objects in the Milky Way region, in the part of the sky where you can also find the Eagle Nebula. M17 is visible even with binoculars or small telescopes. You may use the bright stars of Sagittarius to find this target.
Omega Nebula M17, 40 min exposure
For a complete list of astrophoto images, click here.
I have built an OnStep go-to telescope controller for a Vixen Great Polaris mount. I used an Arduino Mega 2560 as the main controller board, a pair of LV8729 stepper motor driver, and an HC-05 bluetooth module (which connects to the OnStep Android app).
I also built a Smart Hand Controller (SHC) using an ESP32 module, an OLED display, and a button array. The SHC connects to the same serial communication lines (Rx and TX pins) used by the HC-05 bluetooth module. I use a toggle switch to select between the HC-05 Bluetooth module for the Android controller and the Smart Hand Controller with ESP32 module.
I used a pair of 200-step-per-revolution stepper motors paired with 60-teeth and 16-teeth pulley and belt drive system to motorize the Vixen Great Polaris mount with 144:1 worm drive. In this configuration, the total steps are 200 steps * 60/16 reduction * 144/1 teeth worm drive = 108,000 steps per 360 degrees at full stepping. Actual testing showed that accurate tracking is possible even at just 1/64 microsteps (as evident in a 60 second unguided exposures at 900 mm focal length). This brings the total steps per revolution to 6, 912, 000 per 360 degrees, or 19,200 per degree. You need to configure these values in the OnStep code.
The OnStep telescope controller can be connected to NINA to enable automatic slewing to targets and use plate-solving to validate and refine its pointing accuracy. It also connects with Stellarium to display real-time the telescope’s current position.
OnStep will have very accurate pointing and tracking even with just one-star alignment, if properly polar-aligned.
I have installed a laser pointer to my telescope as a tool for locating objects. The laser pointer is mounted on a finder scope holder with collimation screws to enable alignment with the telescope. It has a toggle switch that allows the laser to be turned on and off.
Using laser pointer as a finder
To find an object such as a galaxy or a nebula, I turn the laser on and point the telescope to the target’s approximate location as indicated in a star map. If the target is too dim and there are no bright stars in the vicinity, I just use a pair of binoculars to spot the target and then slew the telescope manually to the target. The laser allows me to know precisely where the telescope is pointed at, and then use the laser to guide the telescope to the target. Observe safety precautions when using laser pointers.
To view posts on DIY projects and astronomical equipment, click here.
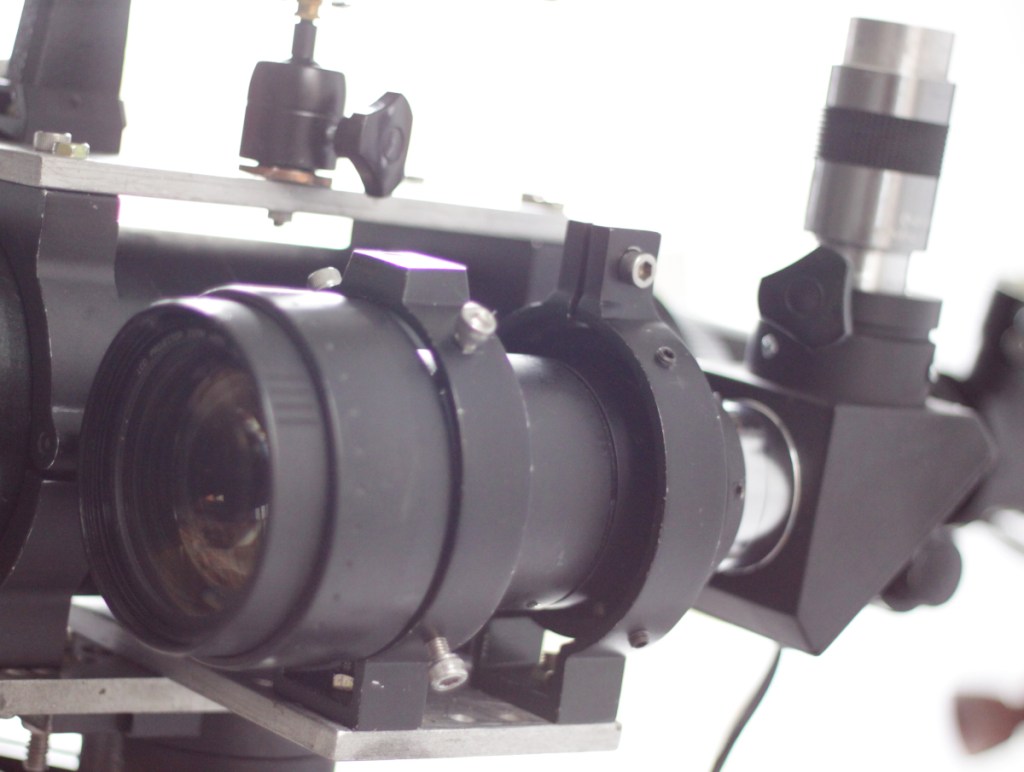
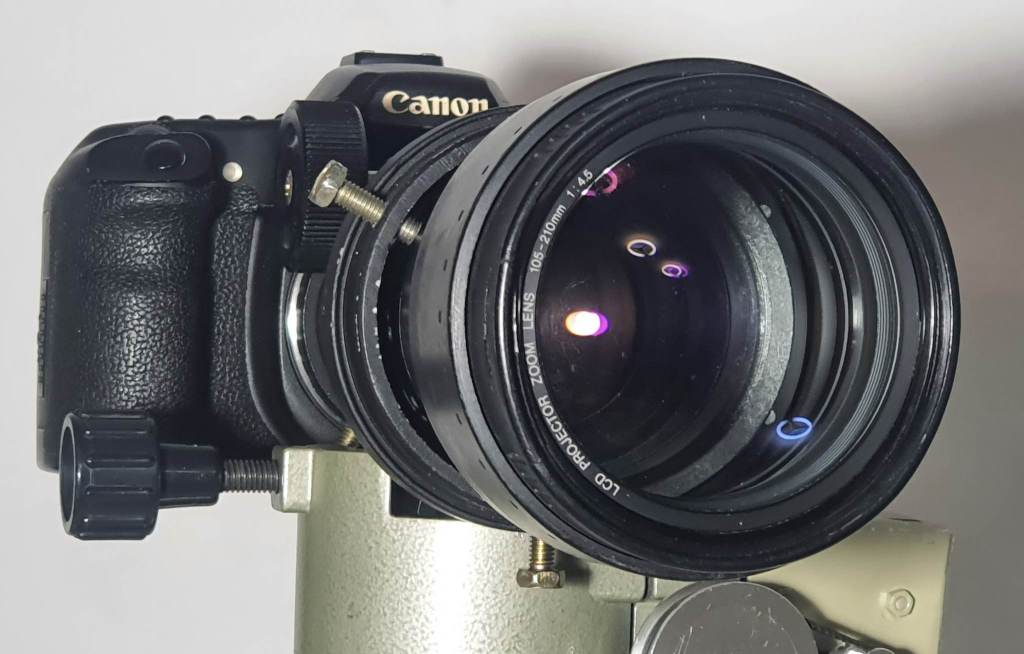
Projectors have lenses that may be used to build low-magnification telescopes. I happen to have found an old 70 mm diameter LCD projector lens with focal length of 105-210 mm which I paired up with an eyepiece to build a DIY telescope.
DIY projector lens telescope
This projector lens, while not designed to be used as a telescope lens, may still provide good views. I measured the proper focus distance and used a DIY adapter to attach a 2-in diagonal mirror and a 40 mm lens to it. This combination produced a 2.6 by 70 to 5.25 by 70 finder scope (wide field of view with ability to zoom). Focusing is done by sliding the eyepiece in and out of the diagonal’s eyepiece holder. I then made an improvised reticle (cross hair) to finally complete the setup. I will be using this DIY projector lens telescope in star-hopping to deep-sky targets and scanning large areas of the sky.
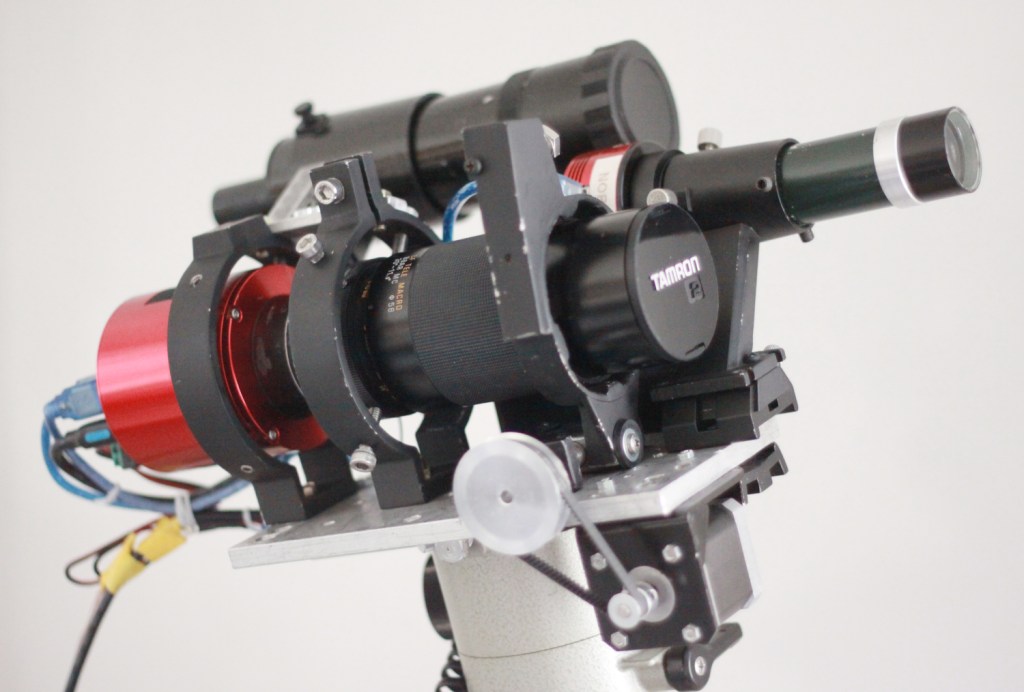
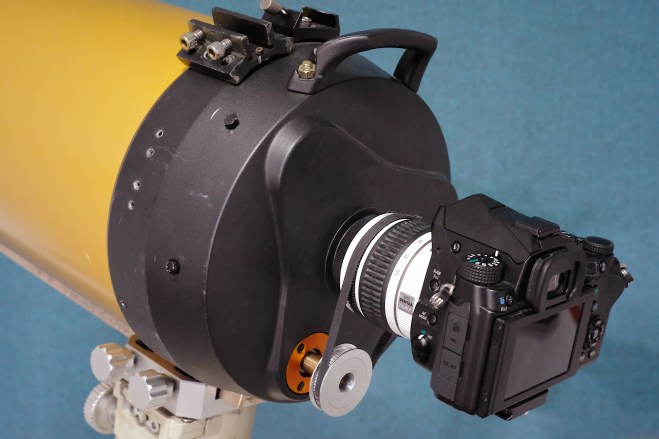
Focal reducers are optical elements (a convex lens or lens group) that converge light from a telescope’s objective. It shortens the focal length and in effect, produces a faster telescope (lower f/ratio) and widens the field of view (larger portion of the sky is imaged). Any decent quality objective lens from an achromat telescope or a finder scope could work as a focal reducer. DIY focal reducers may introduce aberration (coma) and must be considered when attempting this modification.
Using a Vixen 90 mm Objective Achromatic Lens
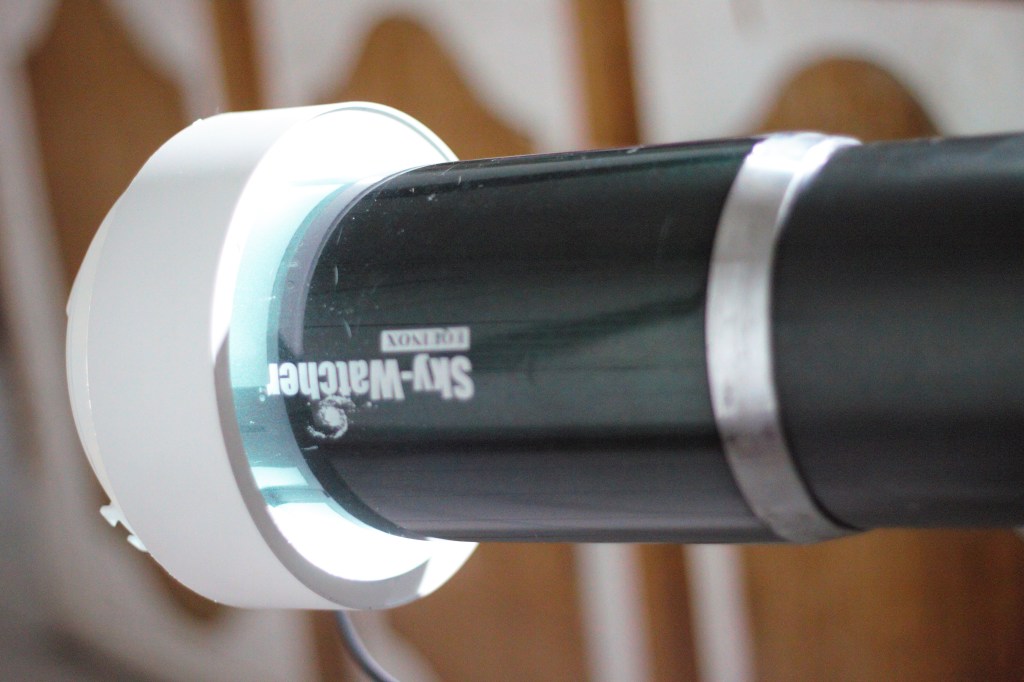
I have built a DIY focal length reducer (focal reducer) by inserting an objective lens from a 90 mm Vixen achromat along the optical system of a Sky-Watcher Equinox 100ED . The telescope’s native focal length is 900 mm at f/9. Using the objective lens of a Vixen 90 mm f/14 achromat, the focal length of the Sky-Watcher Equinox 100ED is reduced to 557 mm at f/5.57. To reach focus, I had to shorten the optical tube to about 55 mm. The focuser’s draw tube was also shortened to prevent it from obstructing the light and stopping down the objective lens when the draw tube moves inward. Varying the distance between the main lens and the reducer lens affects the resulting effective focal length. From 2020 to 2024, I have tried placing the DIY reducer at various distances until I finally found one configuration that produces stars with acceptable sharpness. To view a sample photo with a DIY reducer using a Vixen 90 mm achromat objective lens, click here.
DIY focal reducer using an objective lens from an achromat refractor with an improvised lens cell
Using a Threekor 40 mm or 50 mm Finder Scope Lens
Finder scope lenses can also be used a reducers. I have used the objective lens of a 40 mm Threekor finder scope as DIY reducer for my 8 inch Celestron SCT. I just removed the finder scope’s lens and then placed it at the threaded end of the 8 inch SCT, where you would attach a visual back adapter. I used a spare tube extender (I use M42 spacers) to mount the lens and insert it into the optical path. Upon testing, it reduced the focal length from 2000 mm to 1140 mm. I have also successfully used a 50 mm finder scope achromat lens as a DIY reducer. To view a sample photo with a DIY reducer using a 40 mm finder scope achromat objective lens, click here.
DIY focal reducer using a finder scope lens attached to a tube extender using super glue
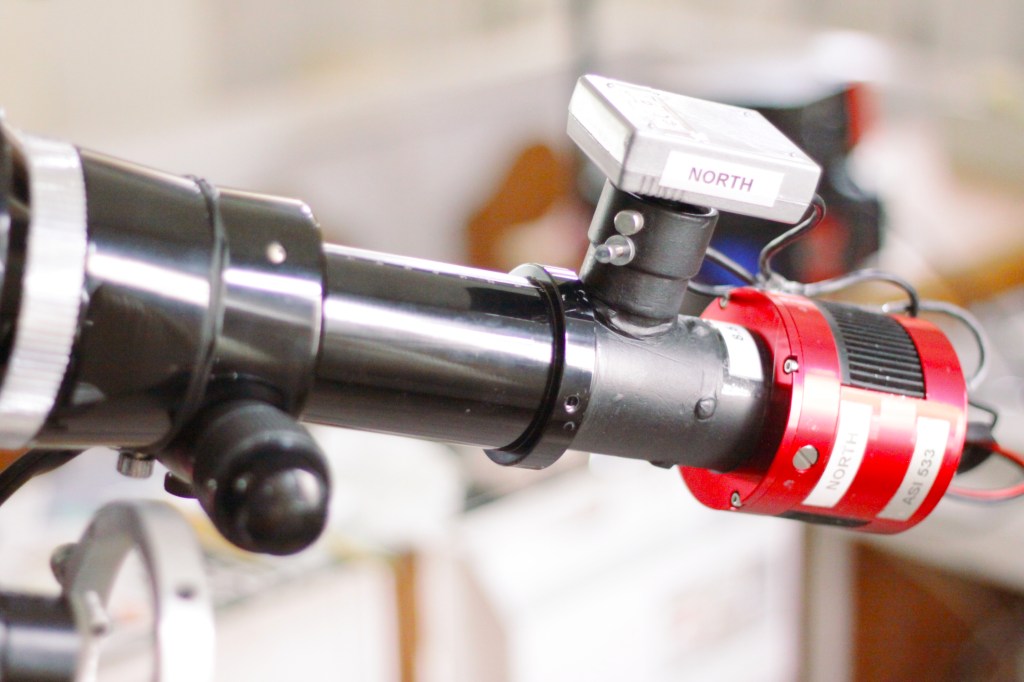
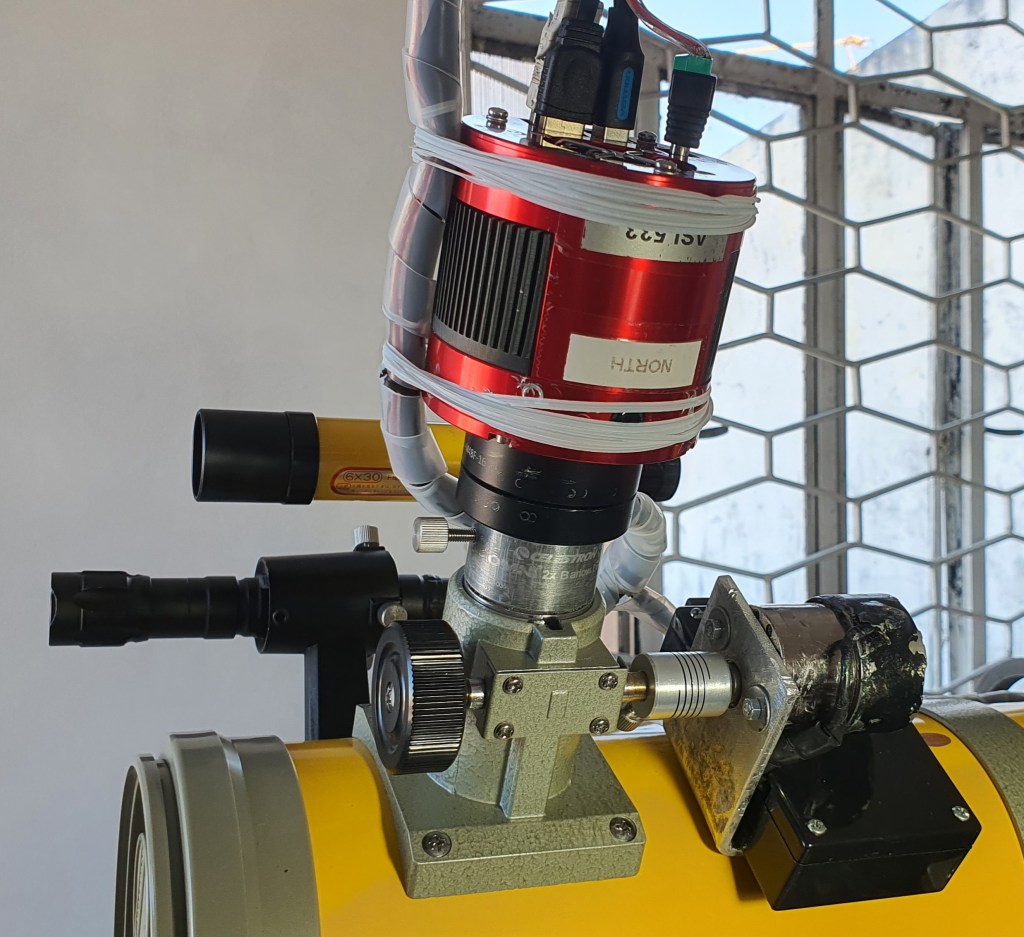
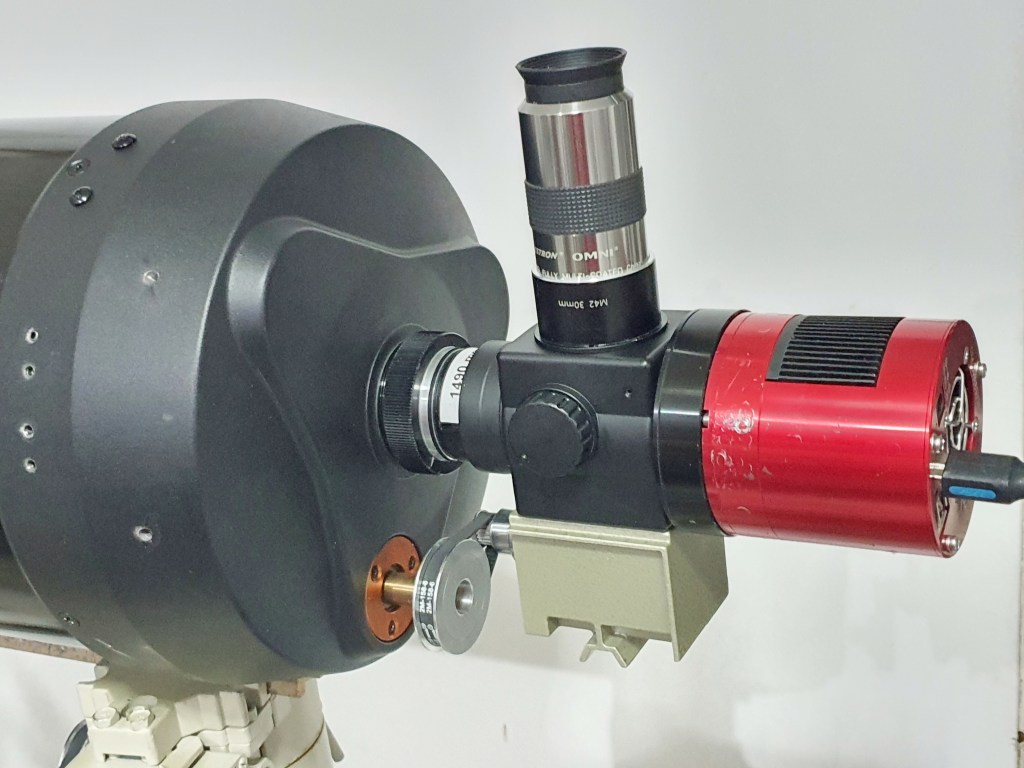
I have built a DIY off-axis guider (OAG) using a mirror from a DSLR camera, some tube extenders (2 in and 1.25 in diameter), and a webcam. To build the OAG, I removed the lens from a Barlow so I could get a 1.25 inch barrel for the webcam attachment, and then fastened it perpendicular to a 2 inch extender, where an appropriate side hole has been made. I then fabricated a small mirror mount (like a secondary mirror mount in a Newtonian) using some brass material, to send the reflected light on to the side. The placement of the mirror and the proper spacing to achieve focus required trial-and-error.
DIY Off-Axis Guider (OAG)
In off-axis guiding, the telescope functions both as an imaging scope and a guide scope. In this configuration, a mirror or a prism receives a portion of the light without blocking the main imaging sensor, sending the light to a guide camera. In this build, I used a high-quality mirror I happen to have found in a non-working Canon 1100D. To use the improvised OAG, focus the main camera first, and then slide the guide camera in or out to achieve focus.
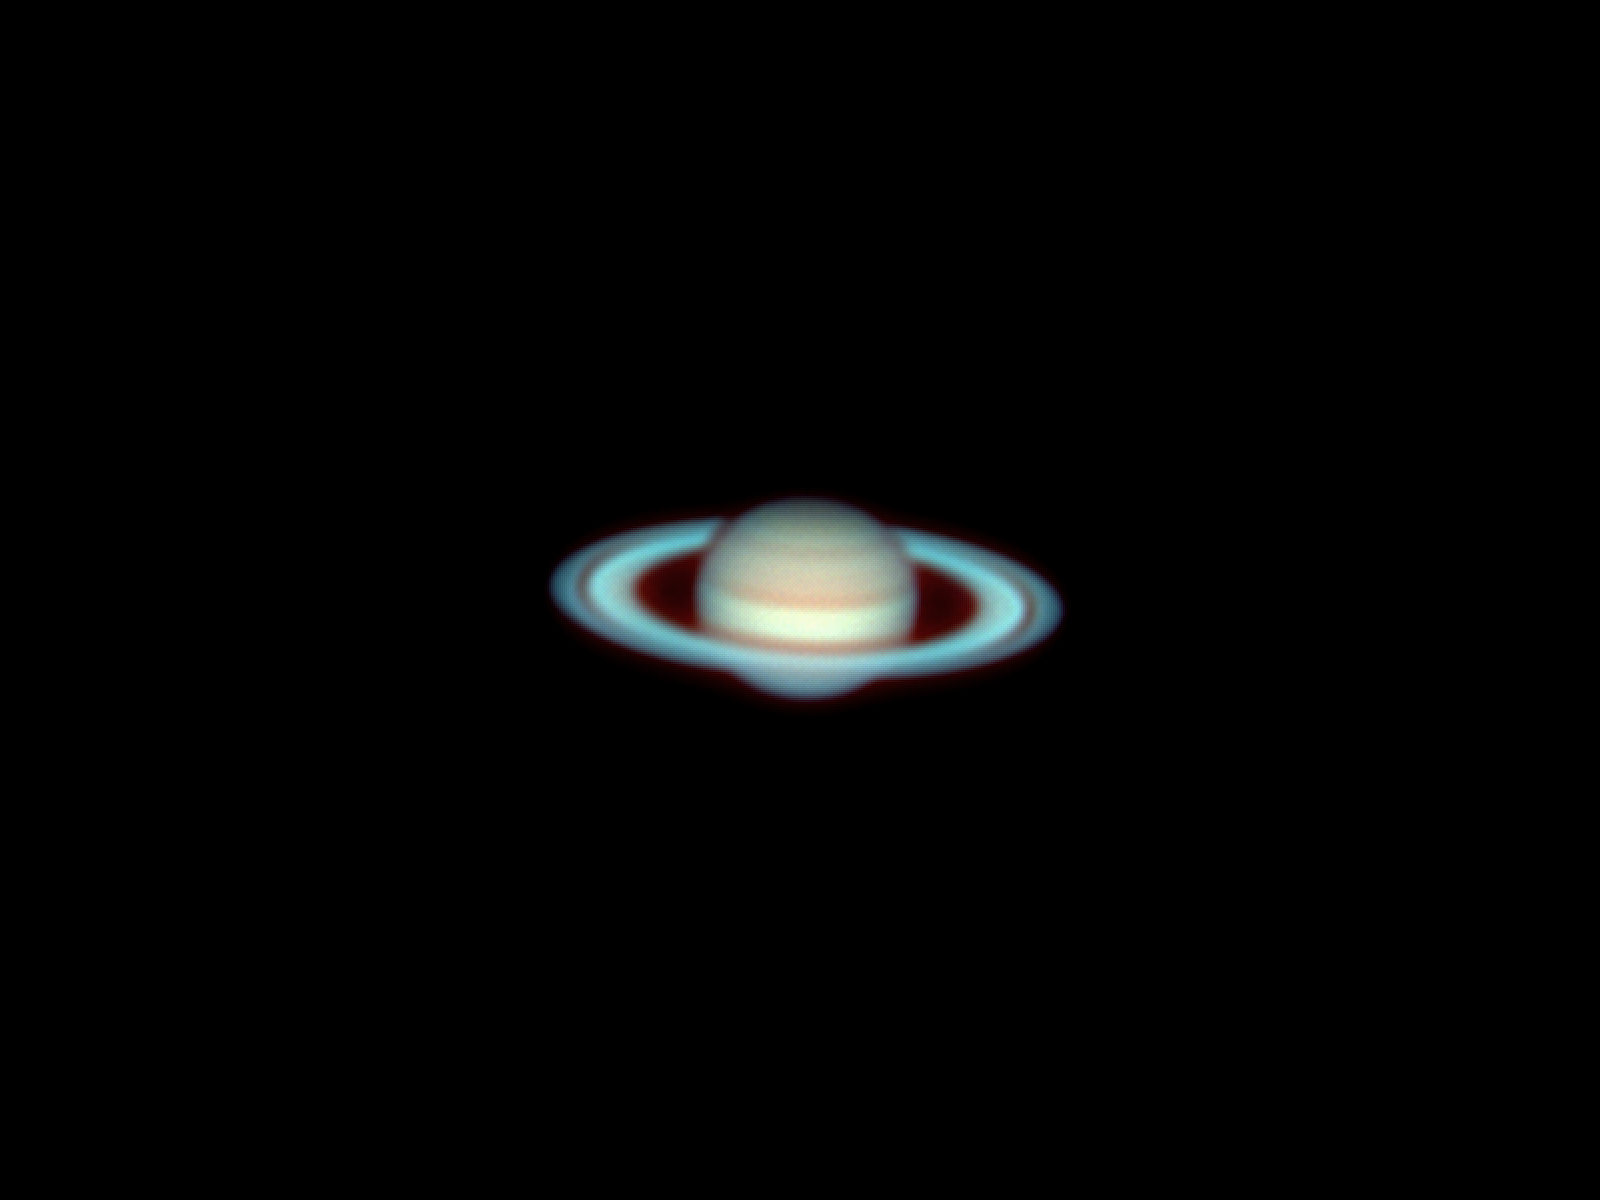
In this Saturn photo, I used a Sky-Watcher Equinox 100ED refractor and a 25 mm eyepiece to project an image onto the sensor of ASI 533 astronomy camera. The magnification of the image depends on the focal length of the telescope, the focal length of the eyepiece, and separation between the eyepiece and the camera’s sensor. While longer telescopes, higher-power eyepieces, and wider separation between the eyepiece and the camera will produce more magnified images, the amount of detail that can be resolved will still depend on the aperture or the diameter of the telescope’s objective mirror or lens.
Saturn imaged through eyepiece projection during the August 2021 opposition
For a complete list of astrophoto images, click here.
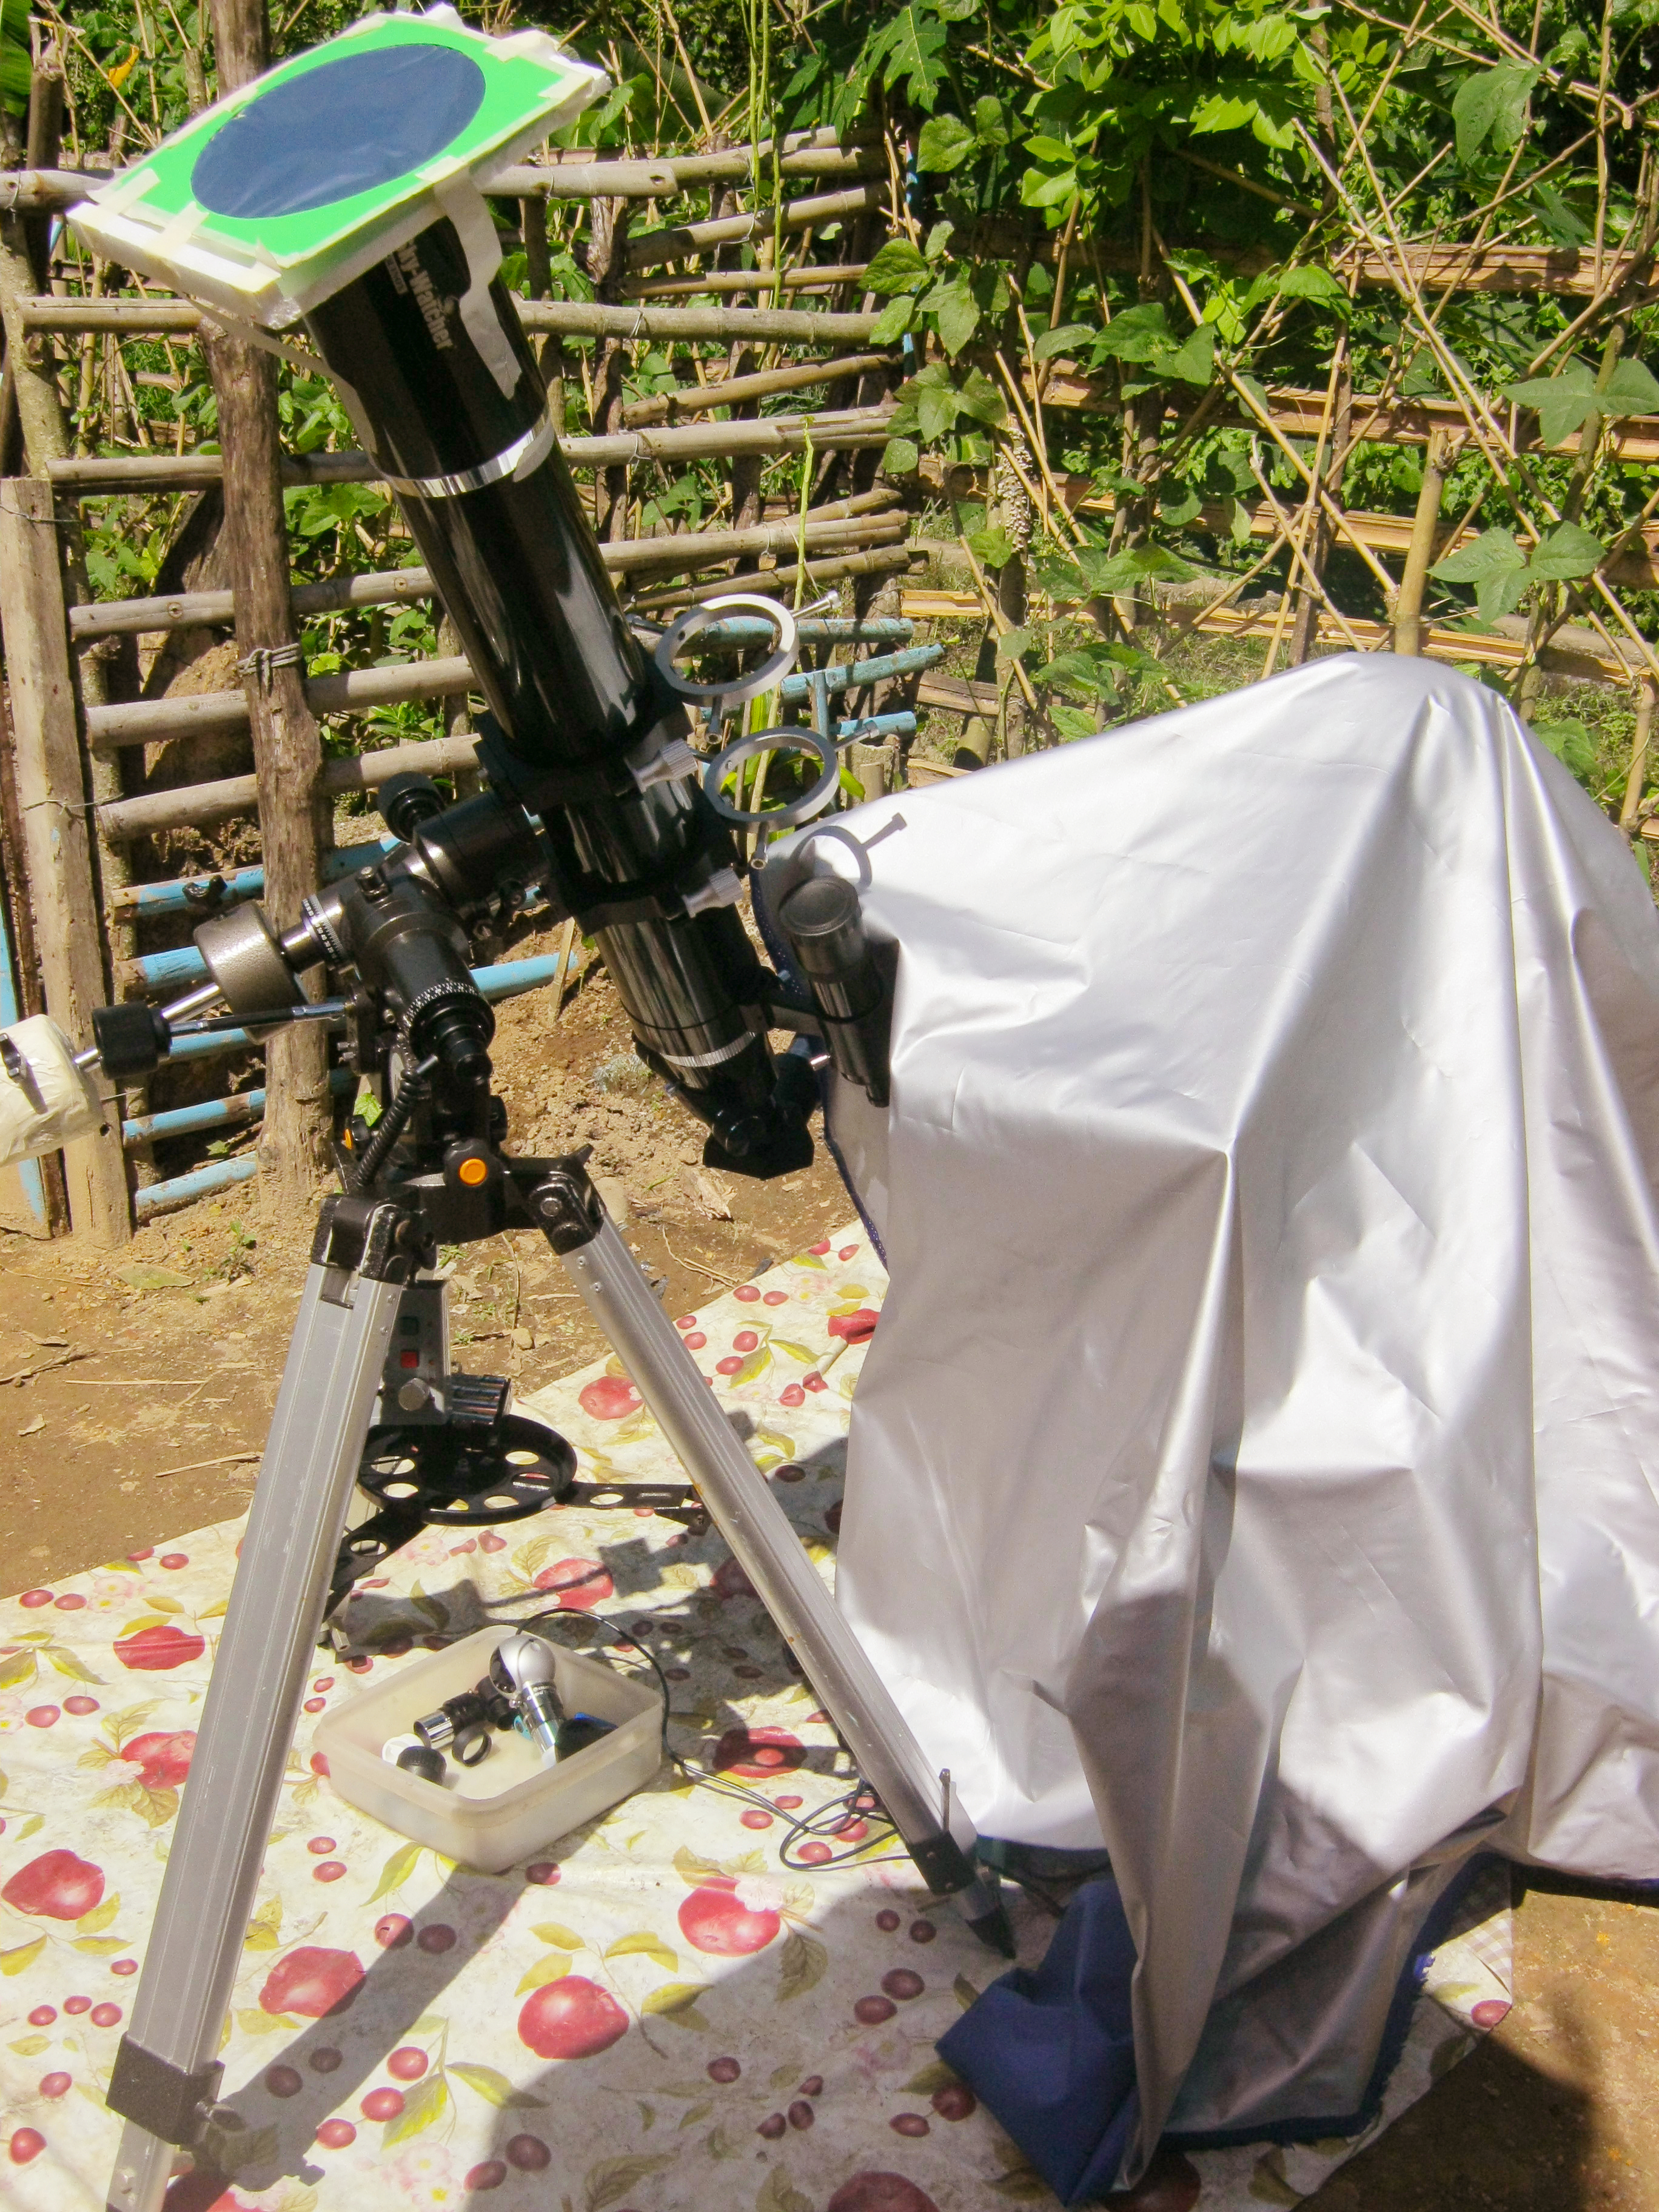
I have been using a Baader Neutral Density (ND) 5.0 Solar Safety Film filter for several years now in solar photography and visual observation. According to the specifications, it reduces solar intensity by a factor of 100,000. The Baader ND 5.0 solar filter produces sharp images with good contrast without changing the white balance.
Baader film solar filter mounted on a telescope
The filter looks like a thin reflective plastic sheet, about A4 size (20 cm by 29 cm). When used with binoculars or telescope, it must be cut to the right size to cover the whole aperture of the optical instrument and installed securely on a rigid frame. Alternatively, the filter may be used without a telescope. Based on my experience, while the solar film may look very delicate and fragile, it is very durable and does not easily get damaged. Special attention, however, must be given to ensure that the film does not get stretched or folded to retain its properties. The filter I purchased in 2011 which has been used extensively in almost every solar event visible in my locality is still in excellent condition.
To view posts on DIY projects and astronomical equipment, click here.
I’ve built a DIY dedicated flat field panel using a repurposed LED light fixture. The flat field panel is a light source with relatively uniform brightness. The panel attaches directly onto my telescope and can be used for taking flat frames.
DIY LED fixture for taking flat frames
With a DIY flat field panel, the unevenness in the illumination of the field such as vignetting and presence of dusts are revealed. When a flat frame is applied to an image, any variation in brightness or illumination across the frame is leveled out (flattened), thus, vignetting and dusts are removed from the image.
Here’s a sample photo with and without flats calibration frames applied.
To view posts on DIY projects and astronomical equipment, click here.
To clean the telescope’s lens or mirror, disassemble the lens or the mirror from the cell, making sure to mark the sides of the glass elements as it is necessary to reassemble them following the correct orientation as determined by the factory. In this video, I used my Sky-Watcher 100ED as an example. Follow these instructions at your own risk and exercise outmost care when cleaning telescope lenses.
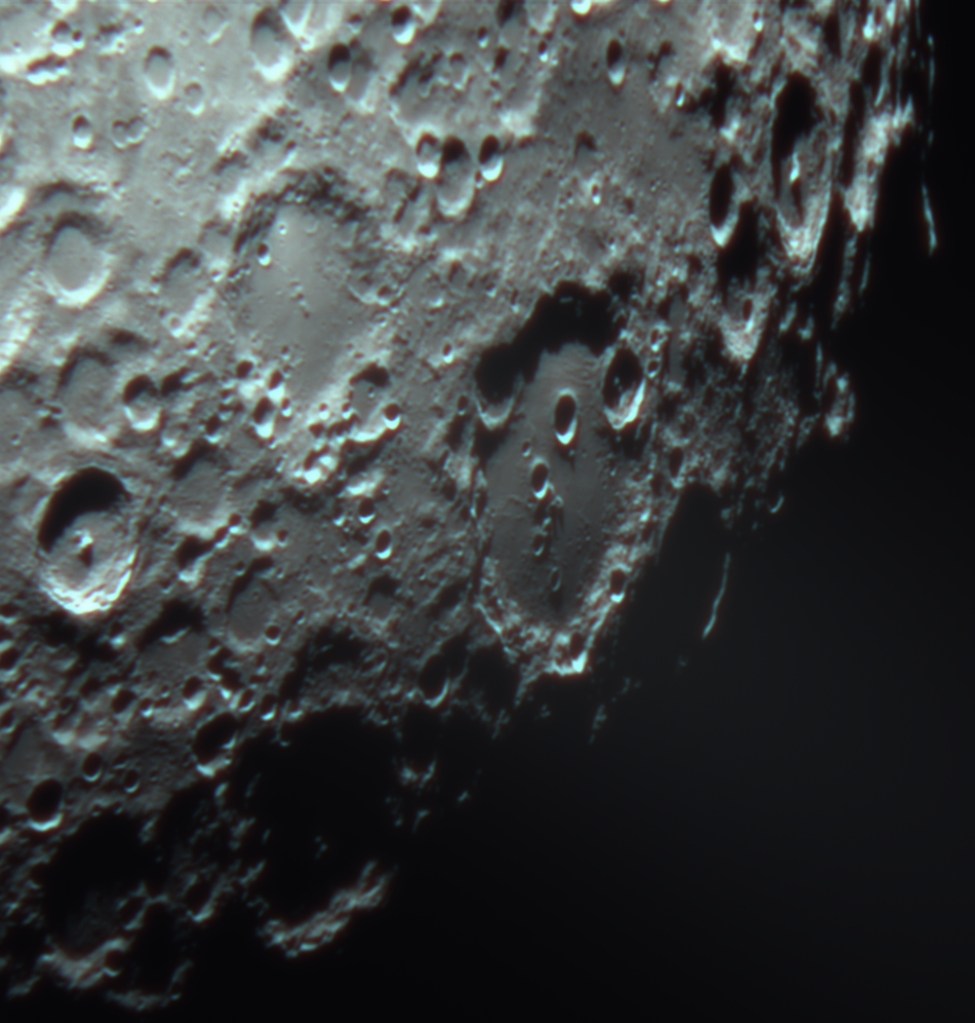
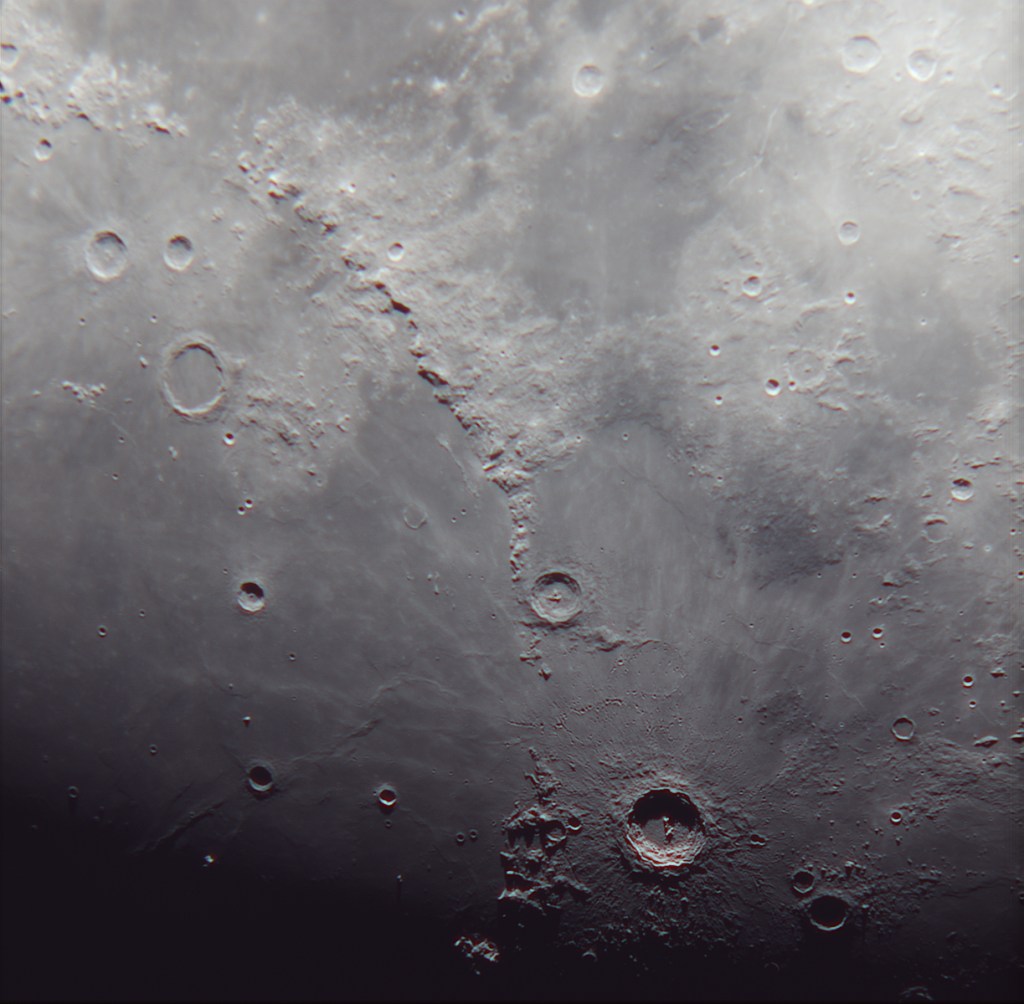
Total Lunar Eclipse imaged with a 4-inch f/9 refractor and a DSLR camera on May 26, 2021 in Bacoor City, Philippines. To watch our guided lunar eclipse observation (livestream), click here.
For a complete list of astrophoto images, click here.
I have built a few electronic focusers for various telescopes. Here are some of the focusers built with stepper motors, stepper drivers, and an Arduino Uno microcontroller. These focusers work with astronomy software such as the Nighttime Imaging N Astronomy (NINA). When the autofocus command is called, NINA takes a series of photos at various focus distances and then measures the diameter of stars for star fields (or the highest contrast for moon and planets). It then calculates the proper distance travel for best focus, and then moves the focuser to that position. An automatic focuser ensures that stars remain focused during unattended imaging runs while you are away from the telescope.
This DIY electronic focuser attached to a standard Crayford focuser. The controller keeps track of the draw tube’s current position and saves this information even when the focuser is powered off.
Here is an electronic focuser for a Vixen R114 reflector for automated and precise focusing.
DIY microfocuser for a telephoto lens using a Vixen’s alt-az mount azimuth lock mechanism
DIY electronic focuser for an 8 inch SCT using a motor drive from a Vixen Super Polaris mount
DIY Autofocuser for Celestron C8 using the Pentax Screw Drive focusing system. To view how I used a Pentax kit lens to add autofocus capabilities to my telescope, click here.
Electronic focusers can be quite useful especially in unattended automatic focusing. There are instances, however, when I would still prefer a mechanical non-electronic focusing, since electronic focusers tend to be slow, and it requires power. In all these DIY focusers, I have always included a clutch mechanism, to disengage the electronic focuser and still allow manual focusing.
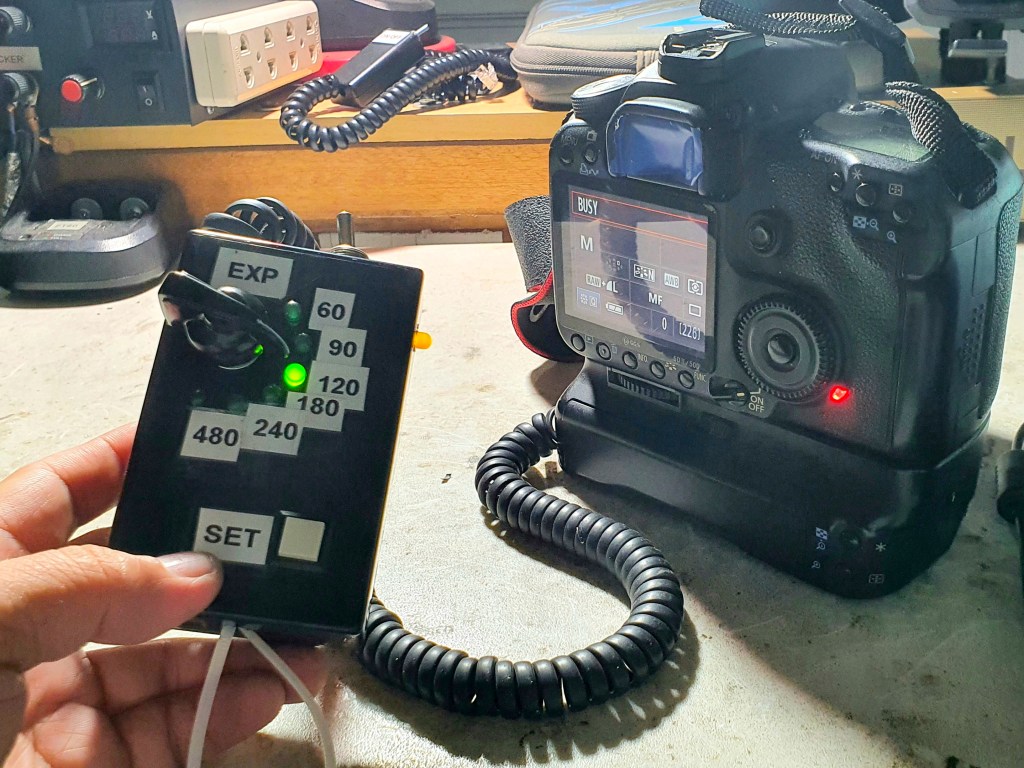
I’ve built a simple DIY intervalometer for deep-sky imaging, to enable my DSLR camera to take a series of photos of galaxies and nebula. It features a rotary dial with preset exposure times. When used with an autoguider setup, the intervalometer allows taking unattended exposures, while the telescope tracks a galaxy or nebula.
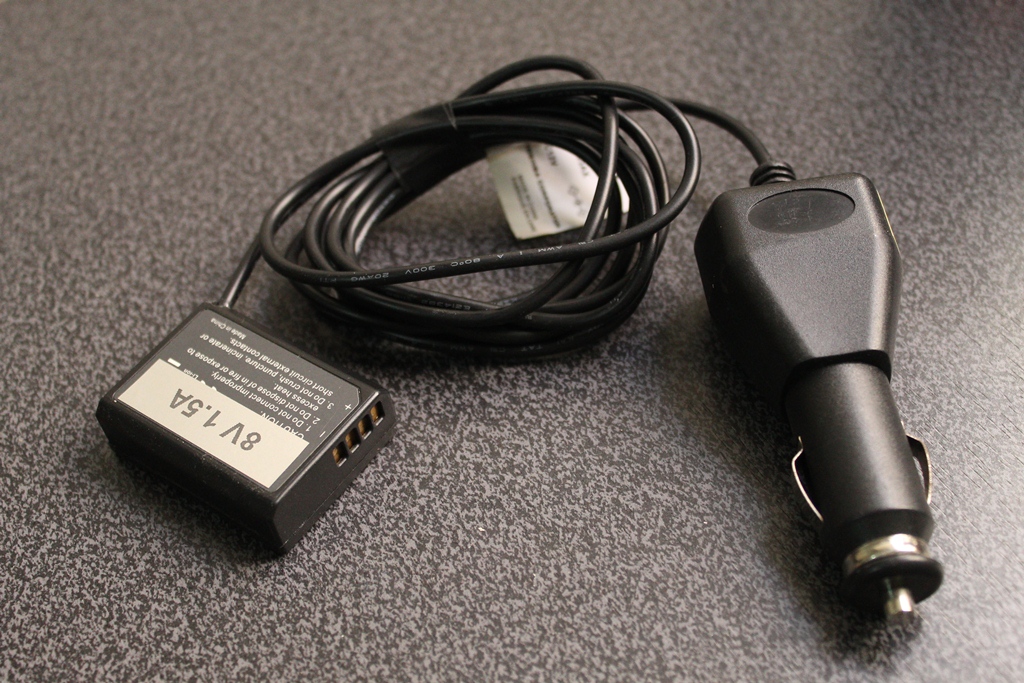
I’ve built a DIY battery adapter for a Canon 1100D using a 12V power connector, a power supply regulator, and housing of an old battery. The DIY adapter provides power to the DSLR from a DIY field battery for extended use during imaging sessions.
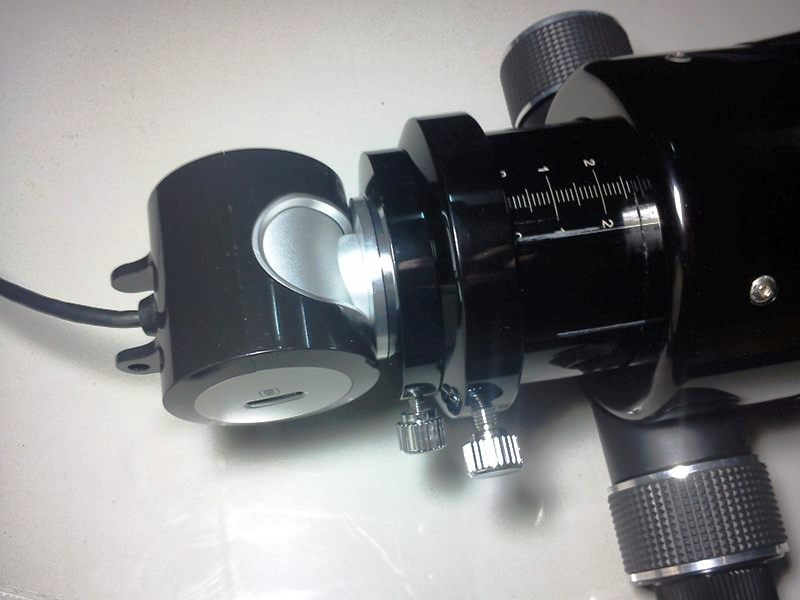
By attaching a webcam or a dash cam to a telescope using a special type of adapter, it is possible to take up-close photos of planets.
Web Camera | Replace the webcam’s lens by a special type of adapter called a webcam-to-telescope adapter. Insert the webcam with an adapter into the eyepiece barrel of the telescope’s focuser.
Mars imaged with an SPC900NC web camera
SPC900NC webcam attaches to a telescope with webcam-to-telescope adapter
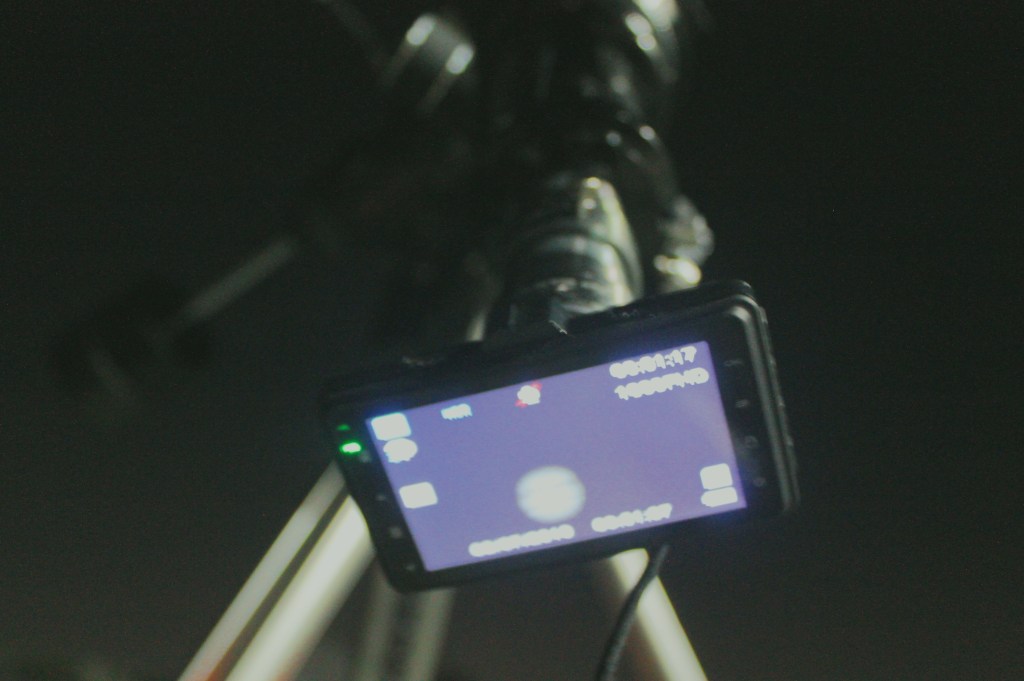
Dash Camera | I repurposed my old dash camera as a planetary camera. The lens was removed and replaced with a webcam-to-telescope adapter and then mounted on to a telescope.
Polaroid N302 dash camera repurposed for planetary imaging
Among all the planets, Venus is the brightest. It is usually seen an hour before sunrise, or an hour after sunset. The phases of Venus may be observed and photographed with a small telescope. This image of the crescent Venus was taken with a Canon 1100D and a 4 inch f/9 refractor.
For a complete list of astrophoto images, click here.
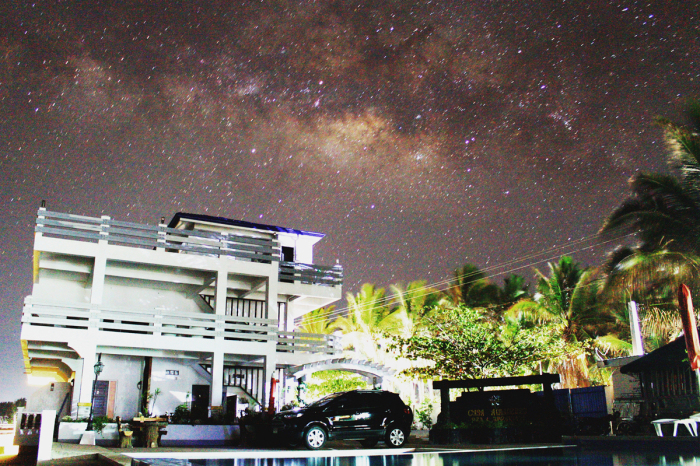
We went on a road trip to Bolinao, Pangasinan. At daytime, we explored the beaches and tourist spots and at night, we stargazed and imaged the Milky Way! With a sky that is relatively dark, I was able to take a photo of the Milky Way with the resort as foreground.